
What to do first when an update fails

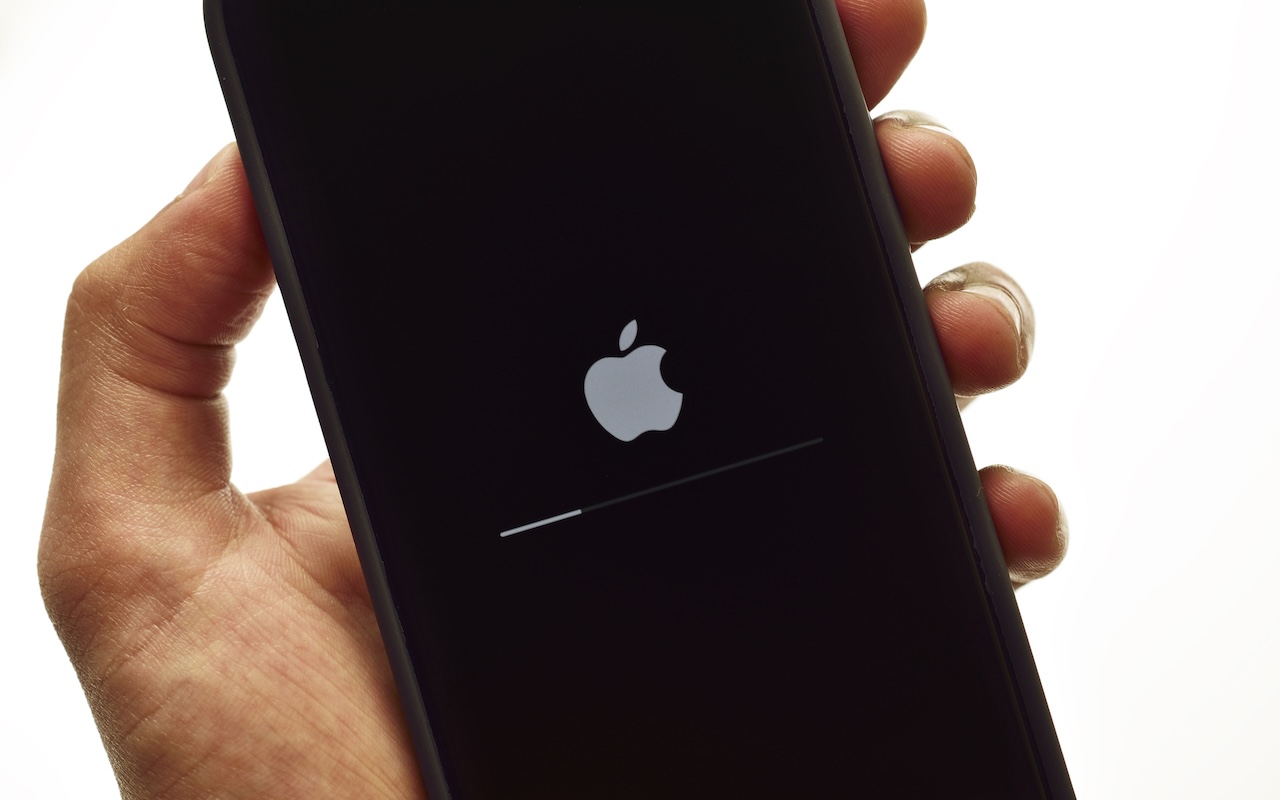
If you are recovering from a failed update with a nearby iphone or ipad, the fastest path is to confirm what kind of failure happened before you start tapping through setup screens. In most cases, the device either stalls on the Apple logo, shows a progress bar that never completes, loops back to the Hello screen, or displays a message asking you to bring another Apple device nearby. Those details matter because they tell you whether the update only interrupted setup, damaged the installed system files, or triggered a restore requirement.
Start with the basics. Make sure the iPhone or iPad has at least a partial charge or keep it connected to power. Put it on a stable Wi-Fi network and keep Bluetooth enabled if you plan to use another Apple device for Quick Start. If the screen is responsive, do not repeatedly force restart it unless it is completely frozen. Repeated restarts during an update can make the process longer and may push the device into recovery mode.
Next, identify whether your data is likely still present. If the device asks for your passcode after restarting, that is usually a good sign. If it asks to be set up again, you may need to restore from iCloud or computer backup after the software issue is fixed. If you see a cable-to-computer icon, the update did not finish and the device now needs a Mac or Windows PC for recovery.
Before moving on, gather a few essentials: your Apple ID password, the device passcode if known, access to your trusted phone number for verification, and a nearby iPhone or iPad already signed in to iCloud. Having those ready prevents setup from stalling again midway through account verification, activation, or backup recovery.
- Charge the affected device and keep it plugged in.
- Confirm Wi-Fi and Bluetooth are on.
- Check whether the device is frozen, on the Hello screen, or in recovery mode.
- Have Apple ID credentials and passcodes available.
- Keep a second Apple device nearby if Quick Start appears.
Recovering from a failed update with a nearby iPhone or iPad during setup
When the failed update leaves the device at the Hello screen or prompts you to use another Apple device, the nearby-device method is usually the easiest way forward. This process uses Quick Start to transfer setup information, connect the device to your Apple ID, and help you continue activation. It does not always repair deeply damaged system files, but it can resolve many interrupted update scenarios where setup data was left incomplete.
Unlock the working iPhone or iPad and place it close to the affected device. Make sure both devices have Bluetooth turned on, and connect them to Wi-Fi if possible. A setup animation or prompt should appear on the working device asking whether you want to set up the new or restored device. Tap continue. If you are asked to scan an animation, use the camera on the working device and center the pattern shown on the affected one.
Follow the prompts carefully. You may be asked to enter the passcode from the working device on the affected one, confirm your Apple ID, and choose whether to transfer settings, data, or just continue setup. If the failed update happened before the device could finish installing iOS or iPadOS, the process may pause while the system verifies activation and checks for a newer update. Let it finish without moving the devices too far apart.
If Quick Start does not appear, restart Bluetooth on both devices, reconnect to Wi-Fi, and try again. Also make sure the working iPhone or iPad is running a current version of iOS or iPadOS. Older software can prevent the handoff from completing. If the affected device repeatedly exits setup or returns to the Apple logo, the issue has moved beyond Quick Start and you should switch to recovery mode using a computer.
- Place the devices side by side.
- Enable Bluetooth and Wi-Fi on both.
- Tap continue on the working device when Quick Start appears.
- Scan the setup animation if prompted.
- Complete activation and let any pending software tasks finish uninterrupted.
When Quick Start is not enough: using recovery mode correctly
If a nearby iPhone or iPad cannot complete setup, the failed update likely damaged the installed operating system enough that the device needs to be reinstalled. This is when recovery mode becomes the right tool. Recovery mode lets a Mac or Windows PC download a fresh copy of iOS or iPadOS and either update the device without erasing data or restore it completely if the update path fails.
First, connect the device to a computer with a reliable cable. Open Finder on a Mac running a recent version of macOS, or open Apple Devices or iTunes on Windows depending on your system. Then put the iPhone or iPad into recovery mode using the correct button sequence for that model. Newer iPhones and many iPads require pressing volume up, then volume down, then holding the side or top button until the recovery screen appears. Devices with a Home button use a different hold combination with the top or side button and Home button.
Once the computer detects a device in recovery mode, choose Update first. This attempts to reinstall the operating system without erasing personal data. The computer will download the software, verify it, and send it to the device. If the download takes too long and the device exits recovery mode, repeat the button sequence and try again. If Update fails or the device returns to recovery mode afterward, the remaining option is Restore, which erases the device and installs a clean system.
After a successful restore, you can return to the nearby-device setup method to sign in, reactivate, and restore from iCloud backup. This two-step approach is common: recovery mode repairs the software, and Quick Start helps you finish setup smoothly.
- Use a good cable and stable internet connection.
- Choose Update before Restore whenever possible.
- Repeat recovery mode if the device times out during a long download.
- Expect Restore to erase the device, so use backups if available.
- After reinstalling iOS or iPadOS, use Quick Start again for setup.
How to protect your data and restore what was lost
A failed update does not always mean your files are gone, but you should approach recovery in a way that gives your data the best chance. If the device still accepts your passcode or briefly reaches the Home Screen, avoid installing more apps or making major changes until you verify whether iCloud backup is current. Go to backup settings if possible and check the last successful backup date. If the device cannot finish booting, look for the most recent backup from another trusted Apple device or from your computer.
When setup resumes after recovery, choose the restore option that matches your situation. An iCloud backup is usually the most convenient if you have strong Wi-Fi and enough time to let apps and photos download in stages. A computer backup can be faster for large photo libraries or many apps, especially if the backup was encrypted and includes saved passwords, Health data, and Wi-Fi settings. If no backup exists, signing back in with your Apple ID may still restore synced content such as contacts, calendars, notes, iCloud Photos, messages in iCloud, and files stored in iCloud Drive.
Be careful when comparing what is synced versus what is backed up. Synced data returns after sign-in because it lives in iCloud. Local-only data, app documents not included in sync services, and certain media imports may only come back from a backup. That is why it is important not to assume that signing in alone restores everything.
After the device is stable, verify key items one by one instead of assuming the restore is complete. Check photos, contacts, messages, notes, app logins, and two-factor authentication apps. Some apps require a fresh sign-in after recovery, and some banking or security apps may need to be reauthorized.
- Check the date of the latest iCloud or computer backup.
- Choose iCloud restore for convenience or computer restore for speed and completeness.
- Sign in to iCloud to recover synced content even if no backup exists.
- Verify critical data manually after setup finishes.
- Reauthorize sensitive apps and services as needed.
Common causes of update failure and how to avoid the next one
Most update failures come from a short list of preventable issues. Low storage is one of the biggest. iPhones and iPads need room not only to download an update but also to unpack and install it. Weak Wi-Fi is another common cause, especially when the device switches networks, loses signal, or uses a hotspot with inconsistent speed. Battery interruptions matter too. Even if the update starts, a low battery or unstable charging connection can stop the process at the worst moment.
Software conflicts also play a role. Beta profiles, incomplete previous updates, and devices that have gone a long time without restarting can behave unpredictably during major iOS or iPadOS upgrades. In business or school environments, mobile device management restrictions may delay or block parts of the update cycle. On older devices, limited free storage and aging batteries can combine to make updates less reliable.
To reduce the chance of another failed update, prepare before installing. Keep at least several gigabytes free, back up the device the same day, and use a known-good Wi-Fi network. Plug the device into power and avoid using it while the update runs. If the device has had recent freezing, app crashes, or storage warnings, address those first by clearing space, installing pending app updates, and restarting the device before beginning the system update.
It also helps to wait a little after a major release if your device is mission-critical. Early update waves can expose bugs that are fixed quickly in a follow-up release. For most users, the safest pattern is simple: back up first, update on power, stay on Wi-Fi, and do not interrupt the install.
- Free up storage before downloading the update.
- Run a fresh backup right before updating.
- Use stable Wi-Fi and keep the device charging.
- Avoid beta software on primary devices if stability matters.
- Do not force restart unless the device is completely unresponsive.
Contact G2 Computers in Washington Crossing
Need help? Contact G2 Computers today.